Custom Attribute directives can be
attached to HTML elements like input, span etc to provide more features / functionalities
to the element. Custom directives can be created using the ng generate
directive command. Similar to components which use the @Component decorator, a directive uses the @Directive decorator. The directive class can implement the
life-cycle hooks and alter the bahaviour of the directives.
In the following example let us create a very simple Highlighter directive which can be used in a label/span tag and will highlight the label with a color. Let us begin by creating a new directive using the ng generate command as follows.
ng generate directive highliterIn the following example let us create a very simple Highlighter directive which can be used in a label/span tag and will highlight the label with a color. Let us begin by creating a new directive using the ng generate command as follows.
This command will create a new file for the directive highliter.directive.ts. Open this file and alter the code as follows.
import { Directive, ElementRef} from '@angular/core';
@Directive({
selector: '[appHighliter]'
})
export
class HighliterDirective {
constructor(private elRef: ElementRef) {
this.elRef.nativeElement.style.backgroundColor
= "silver";
}
}
Notice
that we are using ElementRef to
reference to the element which is using the Directive. ElementRef is one of the options Angular provides to access the
DOM, we will see more about ElementRef in another post.
In the module file add a reference to the new Directive in the declarations array, since we use the ng generate directive command it will automatically add the reference to the module, if we create the file manually we should make sure that we add the reference.
declarations: [
In the module file add a reference to the new Directive in the declarations array, since we use the ng generate directive command it will automatically add the reference to the module, if we create the file manually we should make sure that we add the reference.
declarations: [
AppComponent,
HighliterDirective
]
Finally in the component template we will add the directive and check the output, the template looks as follows.
<div style="text-align:center">
Finally in the component template we will add the directive and check the output, the template looks as follows.
<div style="text-align:center">
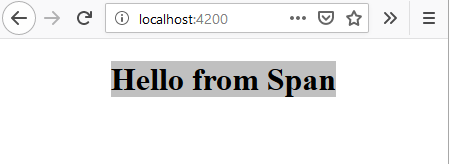
<span appHighliter>Hello from Span</span>
</div>The output will be as follows.


No comments:
Post a Comment